
Here’s this year’s Boomershoot rifle — headed towards one lucky Reader after the event: the Howa HCR 1500 (.308 Win), topped with the Meopta Optika6 3-18x50mm glass.

So postponing my Breakfast Gin, I hie’d me off to the range.
Some background: I popped the scope on last night without boresighting it — just bolted it on, and trusted to luck and the several craftsmen who had built this rig.
Here’s the gun’s very first target (point of aim was the black diamond, at 100 yards):
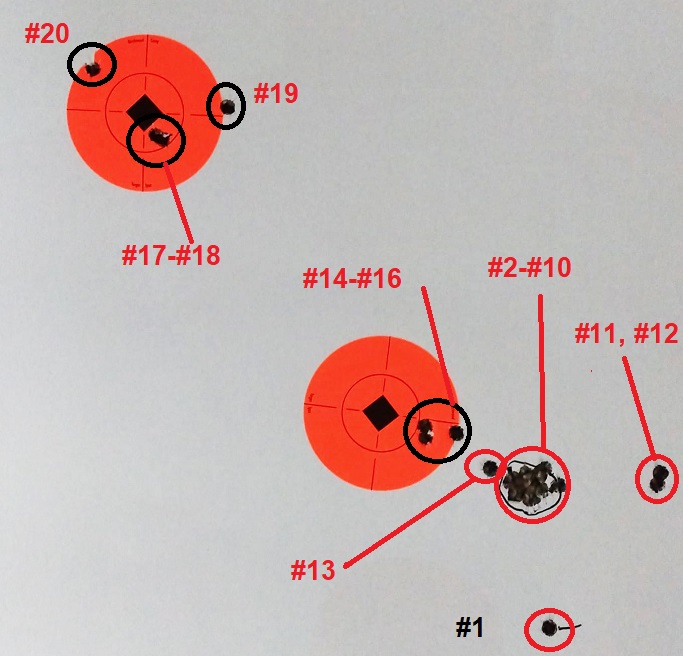
Explanation: Shot #1 was actually an accidental discharge because the trigger caught me by surprise (despite having dry-fired it a dozen times the night before). Anyway, I cursed a little, and then took some care and touched off the next 9 shots (#2-#10). I should remind everyone that all these came from an unsighted scope and a cold virgin barrel.
So I adjusted the scope, and of course Stupid Kim can’t tell right from left, hence the appearance of #11 and #12 way off to the right. So I said some Bad Words again, and clicked back to the original setting (#13), then adjusted the reticle to the left this time, and a tad upwards (#14-#16).
The target was starting to look a little cluttered, so I put up a new target, sent it out and popped off the last four boolets in the box — but alas, at this point the barrel was hot — way too hot, because I was getting excited — and the group opened up with the last two shots.
Lesson learned: in future, only five shots at a time before letting the barrel cool properly.
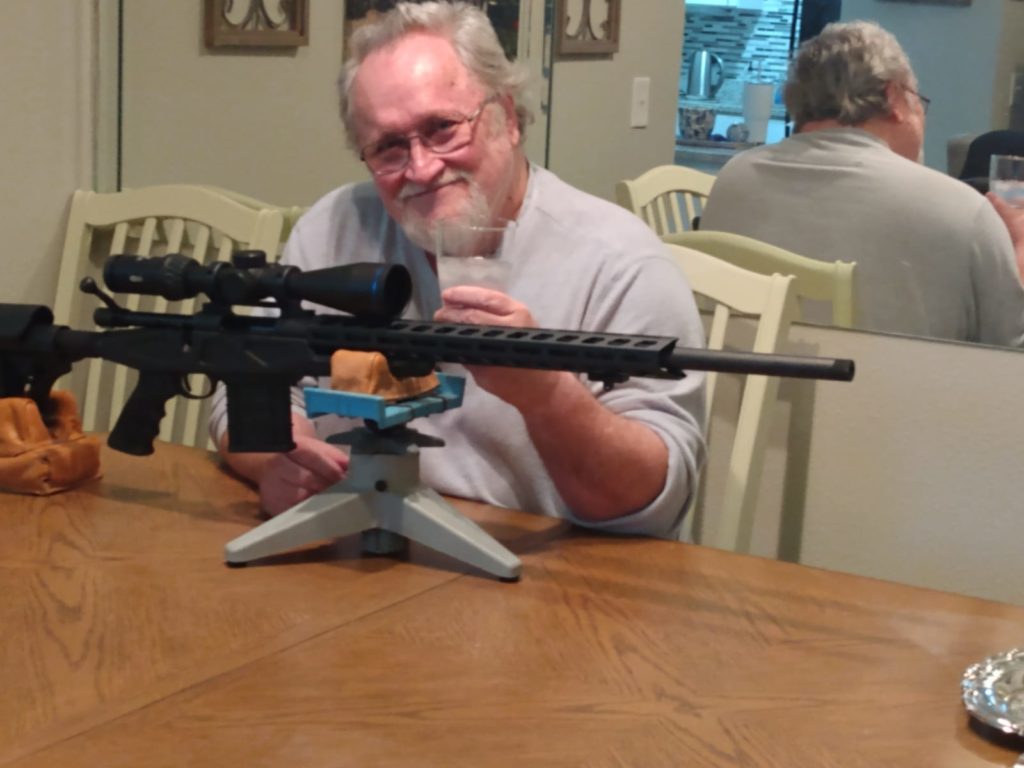
Still, I was moderately pleased. I came home and gave myself a reward:
Some additional thoughts:
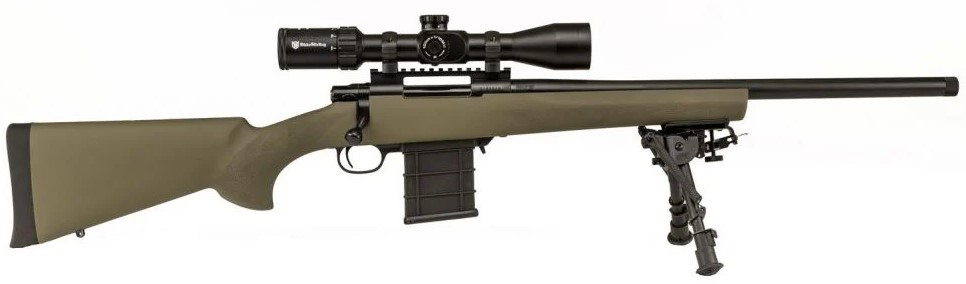
Holy crap but this Howa is a sweet gun. (Here’s a pro’s take.) Everything works as advertised, BUT: the stupid plastic adjustable stock is a little loose, and I can’t get it tight. (Wouldn’t have happened with a proper wood stock, of course, but these are the times we live in.) Still, I’d prefer a regular-style stock over this “chassis” thing… even a plastic one like the Hogue:
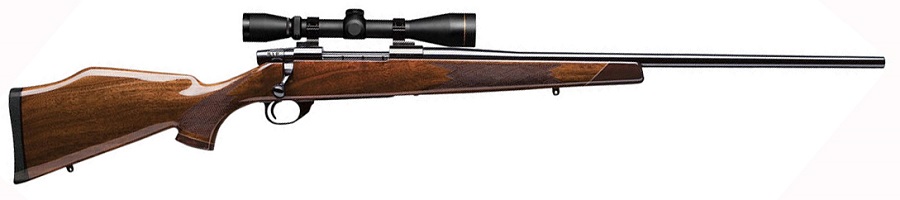
There is apparently little difference between this gun and the Weatherby Vanguard as they’re made in the same factory. No prizes for guessing which one I’d like.
Okay, enough about the gun.
The Meopta scope is likewise a gem. Crisp, clear sights (I forgot the battery, so no illuminated reticle, but it didn’t matter), and the clicks are positive and accurate.
Ammo was the excellent PMC Bronze 147gr FMJ/boat-tail. I’m not going to try anything else, for obvious reasons.
The entire rig cost a tad under $1,500 — and I have to tell you all, I would have to spend a LOT more to get even marginally better results than I did, because it’s far more accurate than I can shoot it.
In Mae’s words, if war were declared, I’d take this rig off to battle, without hesitation.
Very nice, Kim! Yeah, the aesthetics leave me a bit cold, but Howas do shoot! A friend of mine (younger with better eyes) shoots F-Class competition and he’s built several Howas and raves about them. You’ll hate looking at it, but you’ll love shooting it!
Have fun. After the couple of years you’ve had, you deserve some fun.
Cheers,
John
My good friend and shooting buddy here in the Hill Country had Navajo gunsmith Patrick Blueyes in Kerrville, Texas build out a nice precision rifle in .308 with a Howa action, custom barrel and chassis thing fitted with a suppressor. He handloads for that rifle and at 300 yards using Berger bullets with just the right amount of powder he gets incredible tight groups. Just a few grains more or less will open up the group from holes touching to a couple of inches apart which is still rather good. HIs is a good 500 yard rifle when the the wind is friendly and the weather is nice.
My son gave me a big fat torque screwdriver thing for Christmas a year ago and it makes a bit of difference getting the right settings on all the parts mounting the scope on a rifle which surprised me.
Kim,
Love the rifle write ups since the outside around here resembles an ice tray. Sounds like you picked a winner with this set up! My trigger finger is getting itchy now to see what I can do with my ’06.
JQ
Mmm. Tasty! OTOH, apropos of nearly nothing… Those bean bag things. What do you call them? Do they make them for photographic use?
Sandbags? The only use I know for photography is hanging them underneath tripods to lower the center of gravity.
I apologize, but I’ve lost track – are entries still $40 and what is the entry deadline?
Nice shooting, Kim! Well wear that rifle, and have fun with it at Boomershoot.
I have nothing whatsoever against turning money into noise, but just for your readers’ edification, there is an easy way to get the scope of a bolt-action rifle right on target without shooting more than three or four rounds in so doing, and without “chasing holes” all over the paper. In fact, cheapskates like me can do it with a single round.
As I sight in a lot of rifles, and since ammunition isn’t getting cheaper or more plentiful, this is what I do. It is likely also what your local gunsmith does when he sights-in a rifle for you, thereby charging you for half an hour of his time plus a “full box” of ammunition expended. Chances are he took one shot, or maybe a total of four (one to sight in, plus a three-shot group) if he is a perfectionist.
Sandbags or a gun vice are necessary for this procedure, and having a helper is convenient, but it can be done single-handed with a bit of care. It takes rather longer to describe or read the procedure than to actually carry it out. Here are the steps to follow:
1. Safety first.
Empty the rifle of ammunition and keep all ammunition out of reach until the live firing at the shooting range step.
2. Optically centre the scope’s adjustments.
Either count all the clicks possible, and return to the middle values for windage and for elevation, or (easier and quicker) put the scope objective onto a flat mirror, look through the ocular, and adjust the turrets until only one crosshair is visible, rather than two.
3. Fit the scope mounts onto the rifle and the scope into the mounts.
Modern scopes in modern mounts of decent quality on modern rifles generally line up out of the box really close to where they should be. If things are not obviously out of line, at this point I torque down the mount-to-rifle screws, adding a drop of non-permanent threadlocker unless I intend to mess with the mounts again in the near future. Snug, but do not torque or lock, the screws holding the scope into the mounts.
4. Adjust the scope fore and aft for proper eye relief.
Find the optical sweet-spot where the image is maximised, neither appearing smaller than the scope tube (ocular is too close to the eye), nor obscured by it (ocular is too far away from the eye).
Remember that the safe amount of physical eye relief to avoid being hit in the face by the ocular depends on the calibre of ammunition used and on whether one is shooting standing, prone or seated. Bigger calibres recoil more, and therefore generally require more distance between face and ocular. Prone and seated, one generally tends to “climb” the stock towards the scope. The safe minimum has to be accounted for.
5. Get the vertical crosshair plumb.
If the vertical line of the crosshairs is not plumb (i.e. straight up and down) when you shoulder the rifle, and if you don’t have a plumb line handy as a reference, sight at the corner of a distant building or another large vertical line such as a lamppost or telephone pole, using it as a plumb reference while rotating the scope in the mounts. On scopes with an integrated mounting rail, this plumb-setting step is not possible for the end-user, and ought not to be necessary, unless something is out of kilter – rifle, mounts or scope.
6. Snug up the scope in the mounts.
7. Focus the scope to the shooter’s eye.
Shoulder the rifle and look *quickly* through the scope at a plain and indistinct bright background, such as the blue sky, white clouds or a plain ceiling or wall. If the crosshairs do not immediately appear sharply in focus, adjust the focus of the ocular. Do not focus the ocular while staring at the crosshairs, as the eye will naturally focus to them, rather than the scope becoming focussed to the shooter’s eye.
8. Bore-sight the scope.
Take the bolt out of the rifle and, looking through the barrel like down a pipe, direct it at a suitable aiming point 25-50 paces away. I use the white circular lid of a plastic jar, about 10cm – 4 inches across, nailed to a post across the garden, but anything about that size and clearly distinguishable from the background will do. The rifle needs to be held steady with sandbags or in a vice.
Without moving the rifle, come up from looking through the barrel, and look through the scope. Note how far off the crosshairs are from the point of aim of the barrel. Again, without moving the rifle, adjust the scope such that the both the crosshairs and the barrel are “looking at” the centre of the aiming point. Check by looking through the barrel, then through the scope, back and forth a few times, thereby adjusting the scope until the co-alignment of barrel and scope on the aiming point is as close as possible.
9. Take the rifle to the range for test firing and sighting-in.
Bring the rifle, a large paper target, some suitable ammunition, and sandbags or a vice. Target stickers and a marker are also handy, as is a spotting scope. Test firing from a bench is convenient, but prone is also possible. Kneeling or standing is no good for this sighting-in technique. If in doubt, start with a large paper target at 25 or 50 paces. 100 paces will do, if nearer is not possible.
10. Assume a comfortable, well-supported shooting position, aiming the scope crosshairs at the centre of the target. If the rifle is not familiar, dry-fire it a few times like this, to get the feel of the trigger and ensure that it can be actuated without pulling the crosshairs off-target. If the rifle has a set-trigger mechanism, use it.
11. Load and shoot one round of ammunition.
Get as comfortable and steady as possible. With as much care and attention as possible, centre the crosshairs on the target, and squeeze off one “perfect” shot with the scope crosshairs held properly on centre of the target. (A diamond-shaped target with a centre point is very convenient for this.) If the shot was noticeably “pulled”, flinched or was otherwise imperfect, ignore it, paste up the hole, and repeat this step until a “perfect” shot is delivered.
12. Identify the point of impact of the “perfect” shot.
If it is dead on centre of the target, the rifle is now sighted in. More likely, the point of impact will be at some remove from the point of aim, in which case, follow the next step.
13. Bring the point of aim and the point of impact into alignment.
This is the sneaky, ammunition-saving bit. Do not adjust the scope yet!
Return the rifle to the previous position for shooting the “perfect” shot, getting the scope crosshairs perfectly aligned on the centre of the target once more. Now use sandbags or a vice to keep the rifle immobilised in this position. Without moving the rifle (this is essential – there must be absolutely no rifle movement now), and while looking through the scope, adjust the scope until the centre of the crosshairs arrives on the point of impact of the “perfect” shot. Now the scope is “looking” to the same point as the barrel, and you have sighted in the rifle/scope combination. Congratulations!
(This step is easier if you can hold the rifle steady and look through the scope, while a helper gently turns the scope adjusting knobs on your instructions, but it can be done single-handed with secure sandbag or vice support. If, despite your best efforts, the rifle gets moved, then backtrack to step 11 and start again.)
14. Test the groupings (optional)
To satisfy yourself of the sighting-in results, take three more careful shots to verify that the scope is indeed now looking where the barrel is pointing, and to test how your particular ammunition groups from this rifle. You might decide to fine tune things with a click or two at this point, if your groups are not already perfectly centred around the point of aim. If your shooting technique is good, but your groups are nevertheless unsatisfactorily random or scattered, try different ammunition. Rifles can be remarkably picky eaters!
15. “Zero” the rifle (optional)
To “zero” a rifle, decide at what distance you want point of aim to equal point of impact, and adjust the scope elevation knob accordingly. For example, I adjust my .30-calibre hunting rifle scopes such that the rifle/scope combination shoots about 75mm (three inches) high at 100 paces, and dead-on between 260 and 270 paces. This gives impacts about 15 to 18cm (6 to 7 inches) low at 300 paces and about 60cm (2 feet) low at 400 paces, which is adequate for the kind of hunting I do, and I don’t need to mess with scope adjustment in the field. Zeroing is well explained here: http://www.steyrscout.org/sszeroing.htm
16. Threadlock the scope-to-mount screws (optional)
After the scope has been sighted-in and tested to be satisfactory, it is possible carefully to remove the scope screws one at a time, add non-permanent threadlocker to each screw, and torque it back down, without disturbing the zero. I do this when I am happy with the setup, and I know that I don’t intend to fiddle with it, especially on hunting rifles.
Happy shooting!
Denis (of the NoR and the Gun Counter Forums)
Denis!
Long time no hear. Pop over to the Gun Counter once in awhile and let us know you’re still kicking.
Hope all is well with you
Randy.
With adjustable stocks like this I have had good results putting a bit of frictionless tape on the parts in question, it eliminates the slight rattle of stock to tube, and available at Walmart! (as well as other places)
Just one example, from ebay
https://www.ebay.com/itm/UHMW-5A-Polyethylene-Transparent-Film-Slick-Tape-Aggressive-Adhesive-/362958249649